Hi there. How are you?
My Creativebug 31 days of drawing challenge is complete! It was a great experience and I'm proud of the work I created. Click HERE to see the first 12 days of drawings. Here's what I've drawn since I last posted:
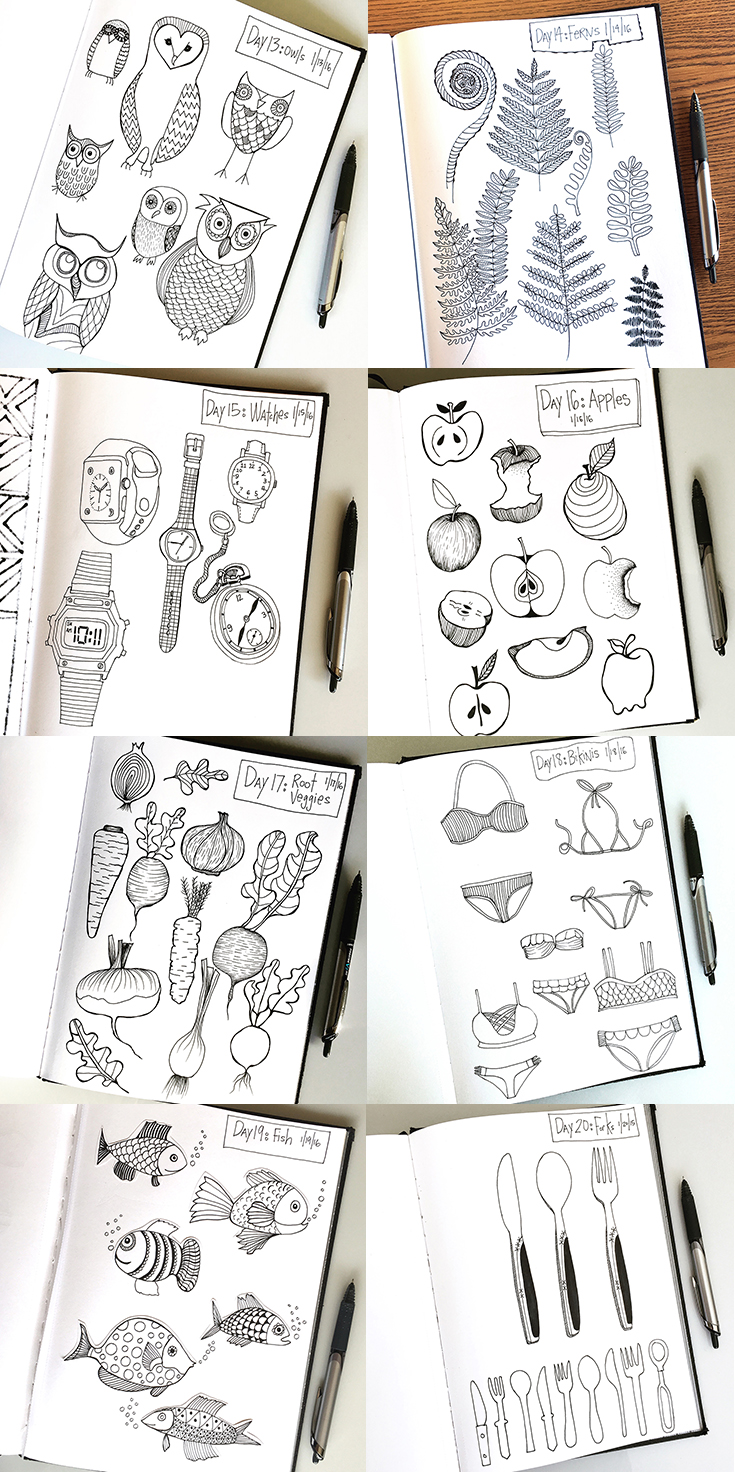
Daily Drawing Challenge, Day 13-20, January 2016
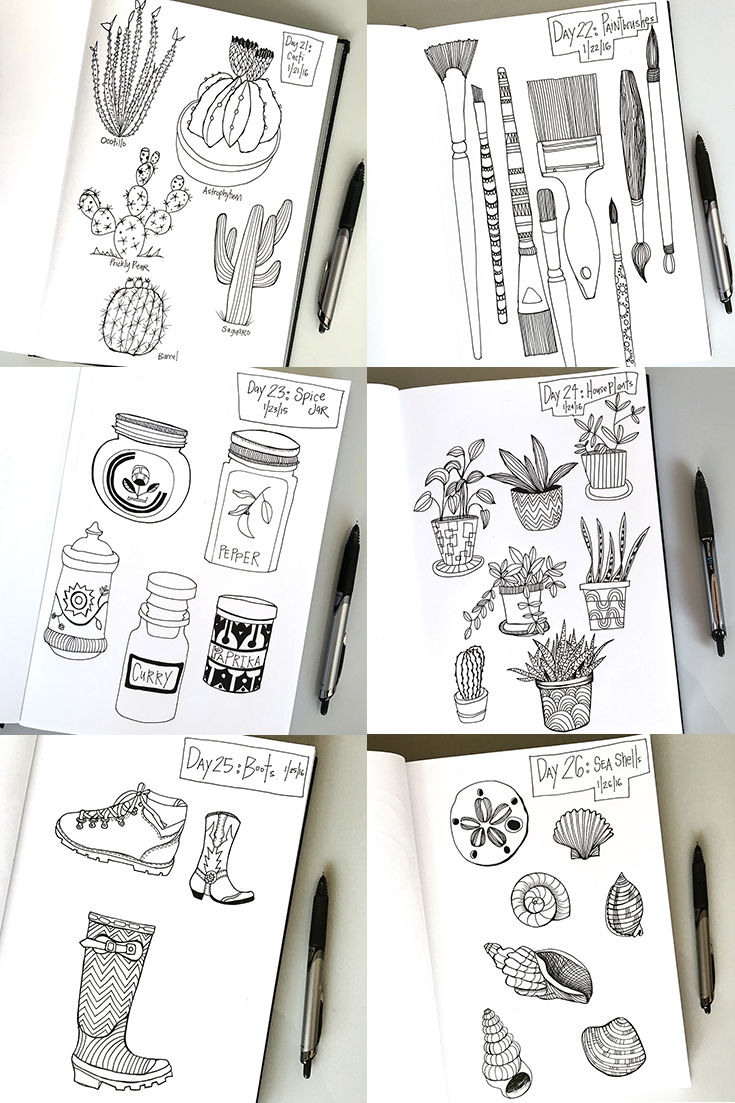
January Daily Drawings - Days 21-26
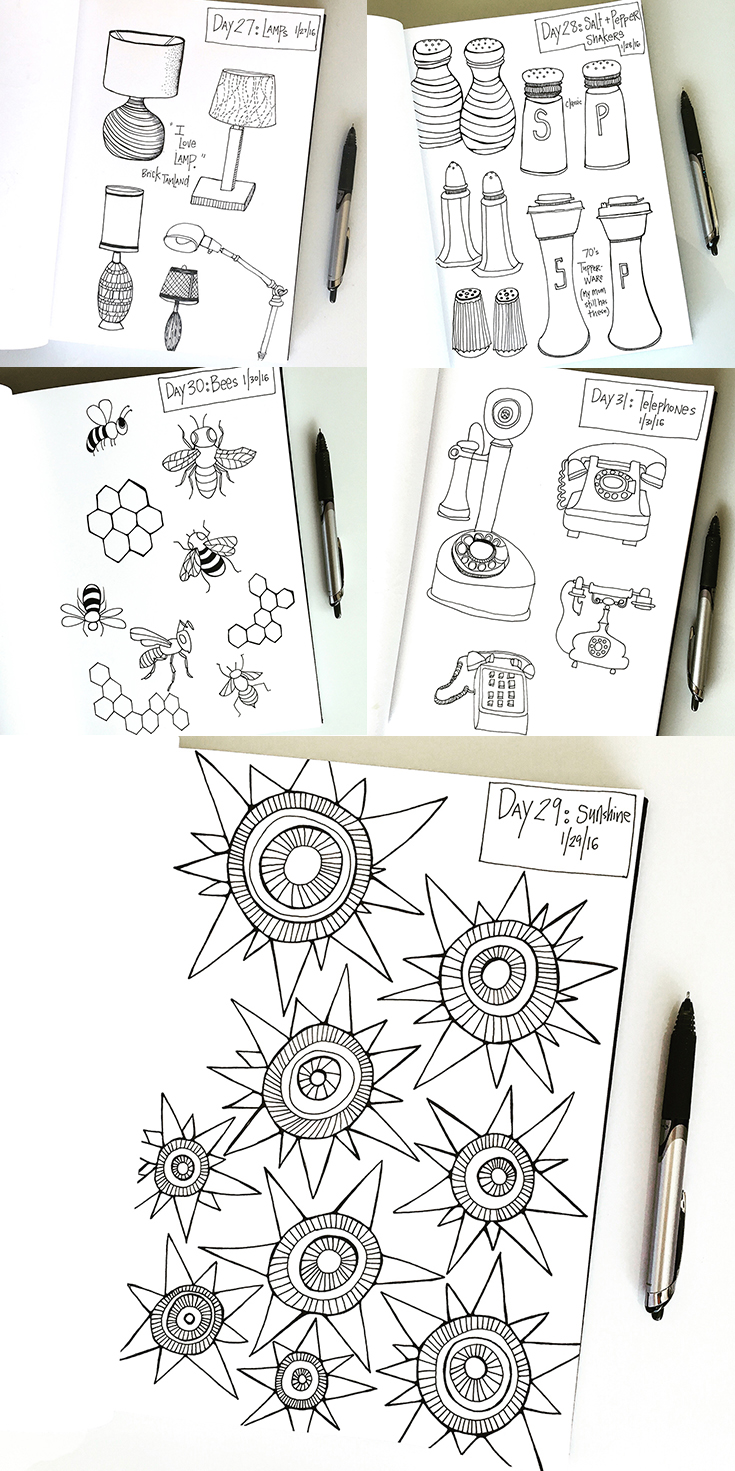
January 2016 - Daily Drawings days 27-31.
So, I decided to make the Day 29 drawing the large one in this vignette, as I like it much better than day 31. I didn't have a whole lot of time to draw those phones, and it's not my most successful drawing. At least I still did the drawing, right?
What's Next?
I woke up on February 1st feeling a little bit of a letdown. With January's drawing challenge complete, I just didn't know quite what to do with myself!
There are actually 2 different February drawing challenges out there and I was planning on taking part in one or both. I sat down to draw yesterday and was just not enthused about either course. I guess I'm getting a little tired of someone else telling me what to do (although that was quite comforting over the last month. )
I've got my own subjects to tackle and I'm ready to get cracking on these! I want to do a special drawing so send out to my mailing list later this month. I want to draw wine and coffee illustrations to complement my beer tea towel design. I want to finish up my second coloring book.
I'm not going to give up the practice of drawing each day, and posting them on Instagram, but I'm going to draw what I want to. If the prompt in one of the daily challenges seems appealing, I'll draw it, but I won't feel beholden to the draw what's been prescribed for today.
That's all for today!
Ciao friends. I have to go draw. See you here next week! Like to see what I'm up to in the studio on a daily basis? Follow me on Instagram.