Hi there. How are you?
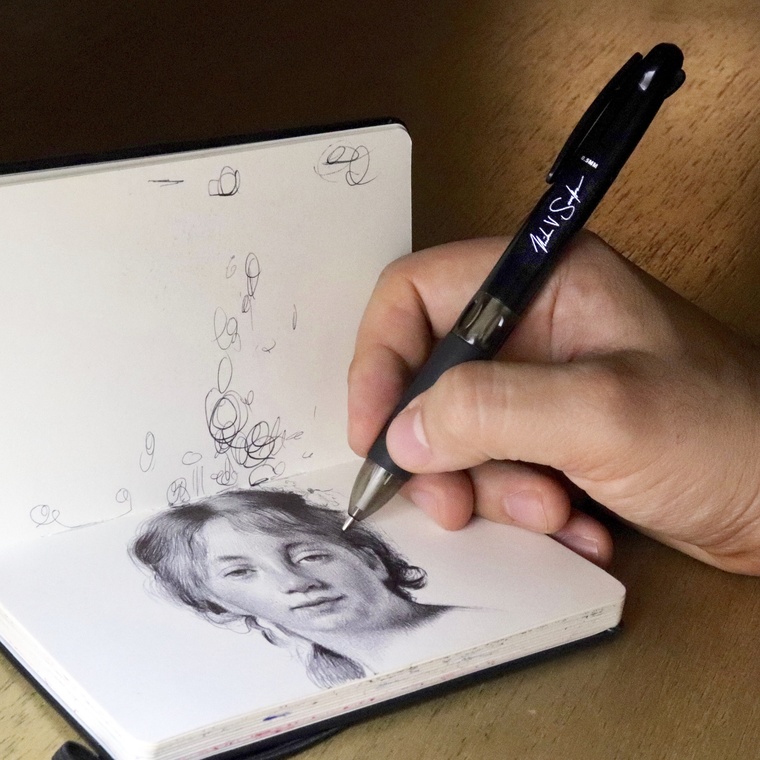
I recently purchased a NS1 ballpoint pen. Designed by Nicolas Sanchez, an incredibly talented ballpoint artist, it has 3 different size points in one pen. As it was designed for artists by an artist, I had high hopes for this one.
Update: NS1 pens are out of stock.
The NS1 pen was designed by the incredibly talented Nicholas V Sanchez. Click to purchase!

Ballpoint pen self portrait by Nicolas V Sanchez. Yes, it’s ballpoint!
Can you even believe this is a BALLPOINT drawing?
Sanchez is a crazy talented artist! Not only is a he a master at rendering the human face, but those skin tones!?! How does he even do that??? I’m in awe.
When Nicholas announced on his Instagram that he has designed a pen, I knew I had to have it! And when I read that a portion of the proceeds from the sale of the NS1 pen goes to art education, I was even more psyched to buy.
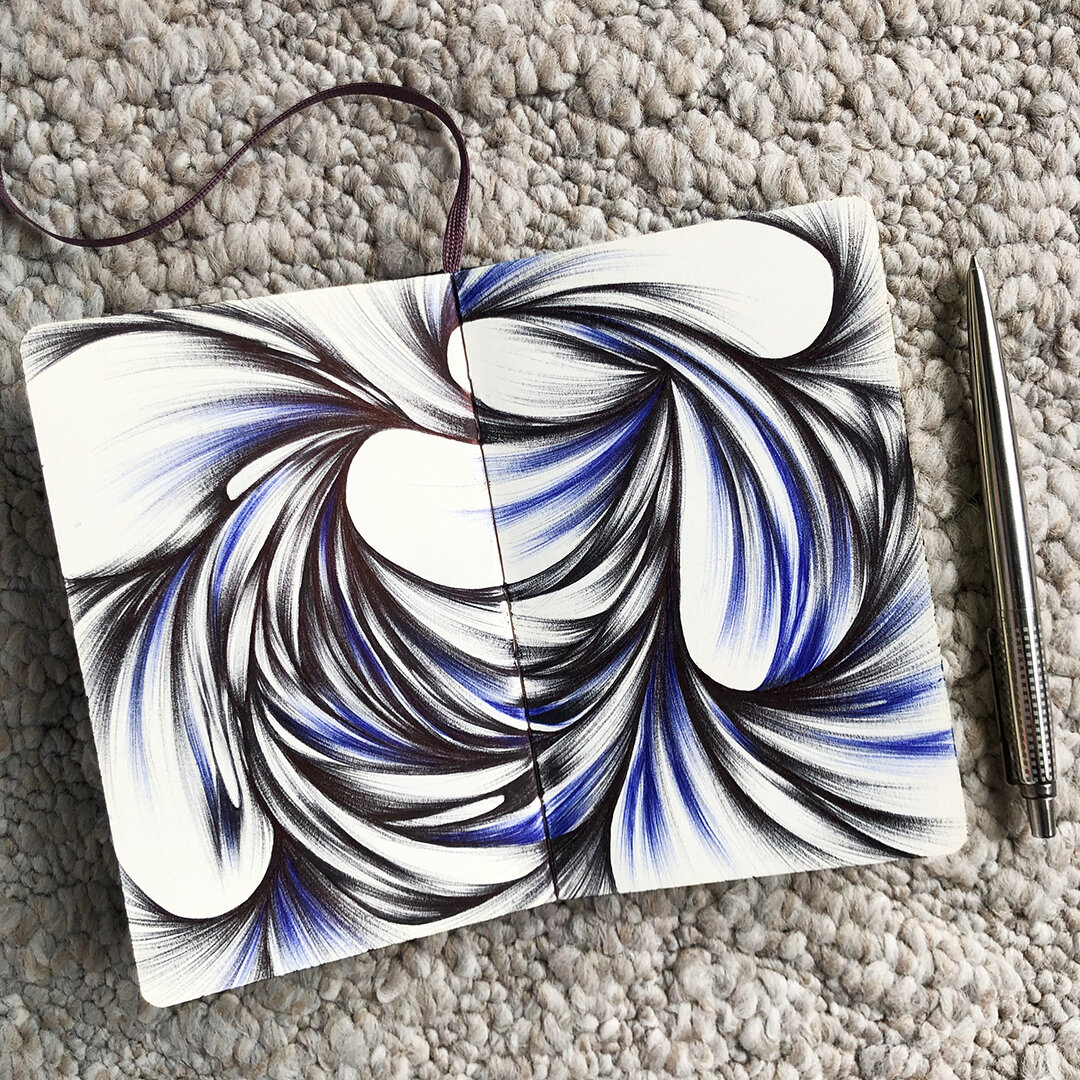
My drawing with the 1MM point of the NS1 Pen in my trusty Moleskine sketchbook.
My NS1 Pen - Love at First Sight
As soon as my NS1 pen arrived, I started drawing and experimenting. Having 3 different nib sizes in one pen is a brilliant idea. With one easy click you can change from the big 1.0 mm tip to the 0.7 mm and finally the tiny 0.5 mm. The soft rubber grip makes this pen super comfy to use. Now I wish all my pens had this this soft grip. Do they still make those foam pencil grips? (Must google this!)
I did the drawing above with the 1.0 mm. I’m pleased to report that the NS1 doesn’t seem to “throw up” ink blobs as readily as many other pens do and the ink flows smoothly. My only complaint was that the nib sometimes rocks around in the barrel when you’re drawing. Other than that, I was smitten with this pen, and maybe even ready to make a serious commitment to this pen.

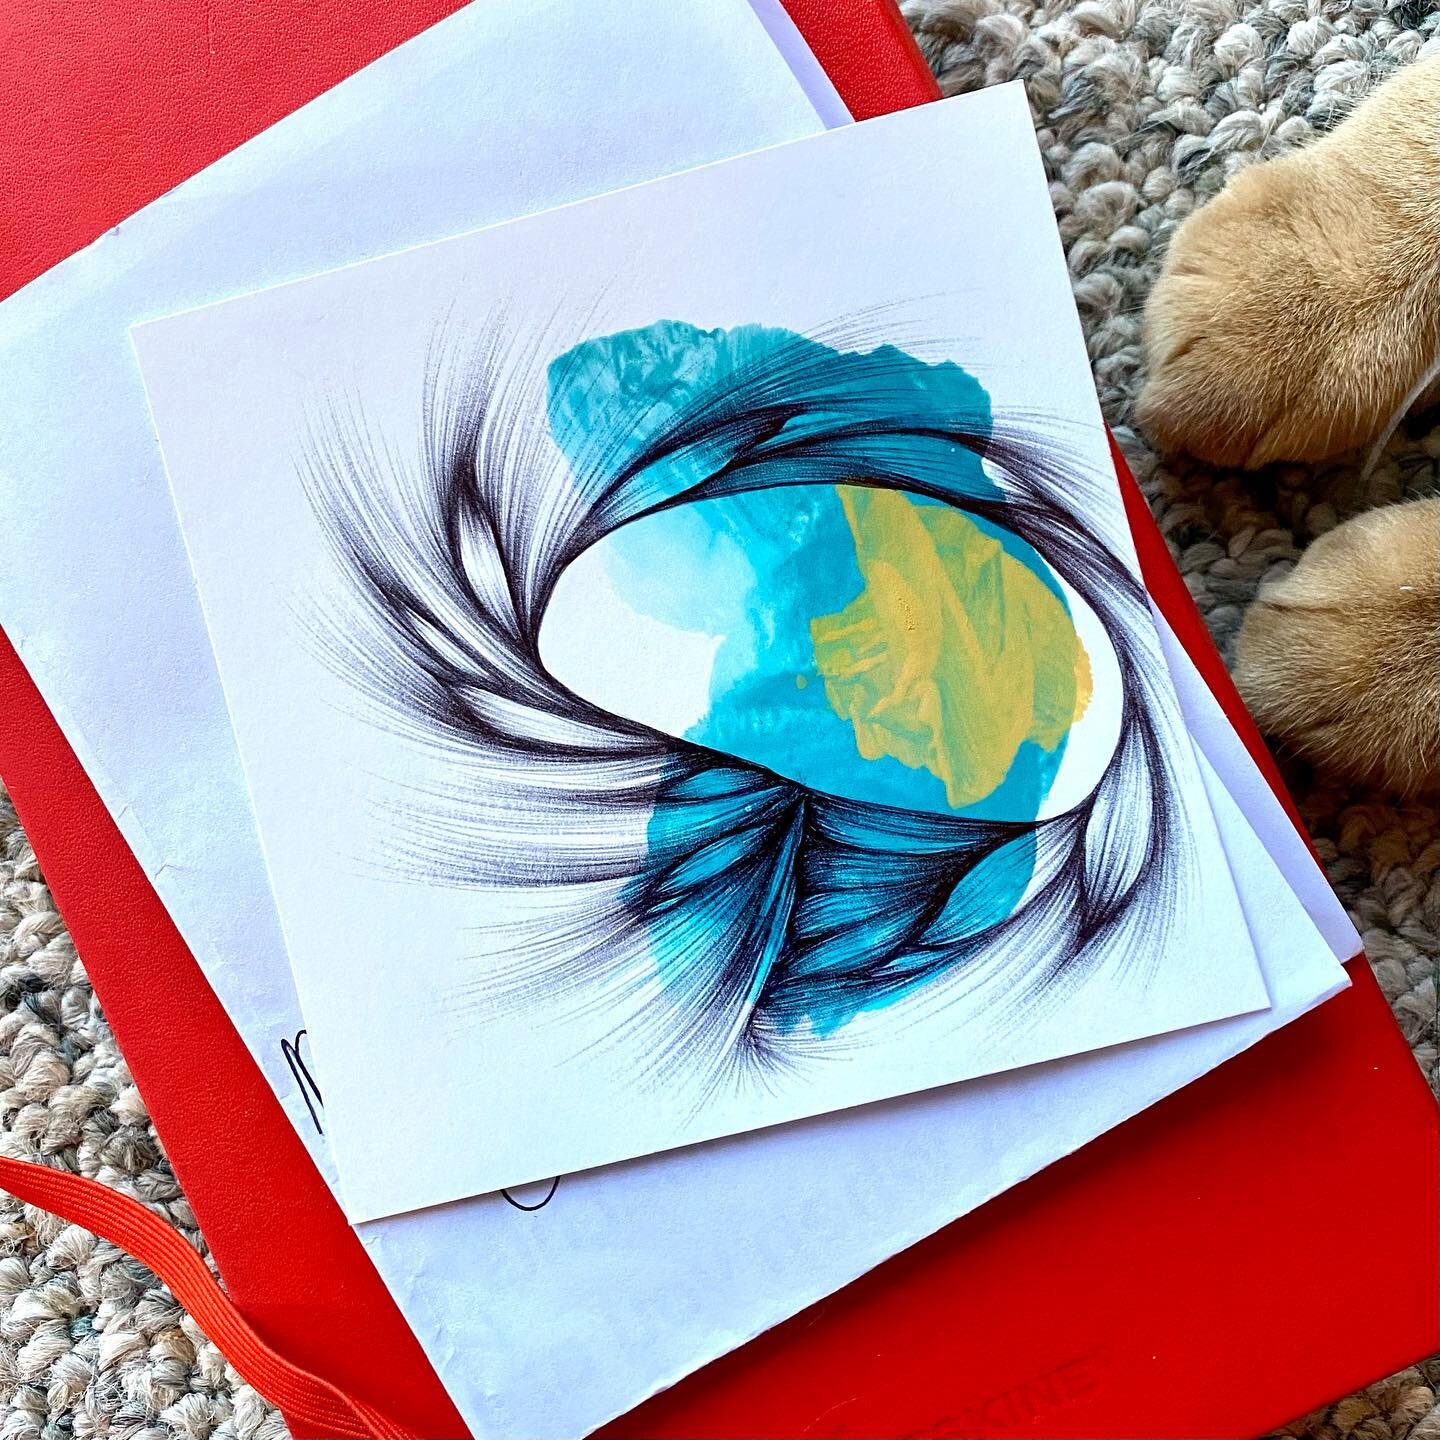
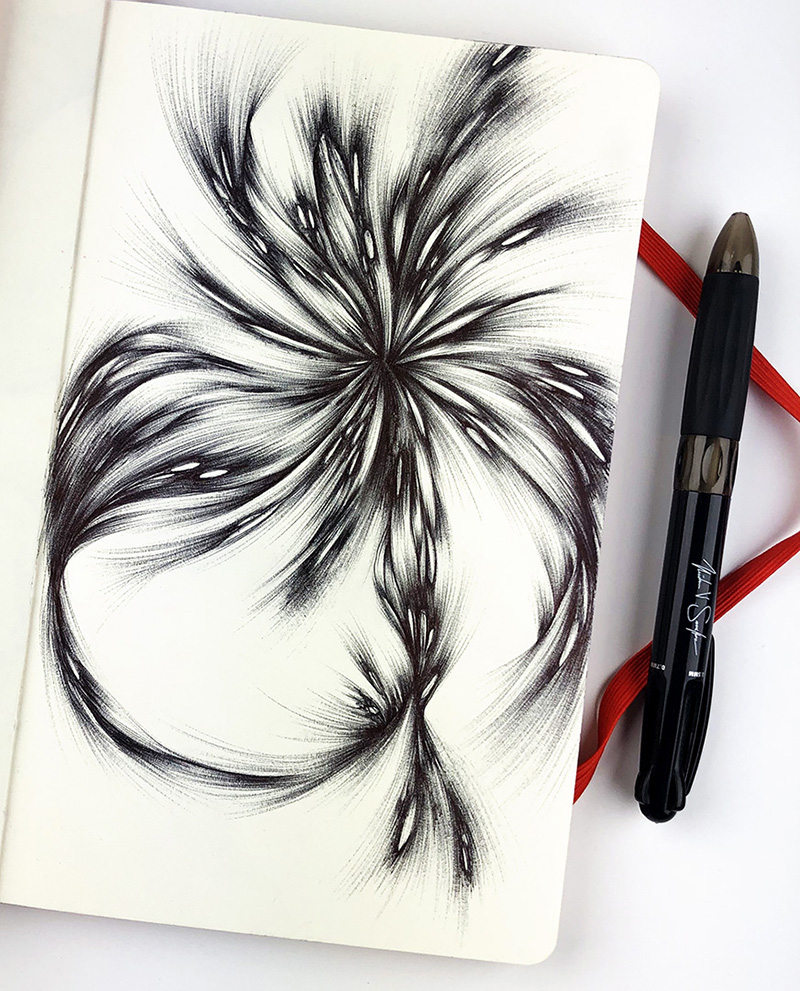
Drawing made with the 0.7 mm point of the NS1 pen.
The Second Date
I decided to give the 0.7 mm point a go, and started another drawing in my pocket sized Moleskine sketchbook. Things looked promising at first, but then NS1 started to get on my nerves.
After using the 0.7mm for a time, the nib started to seize up and the ink would stop flowing. I’d have to stop and scribble on my scratch paper to get the ink flowing again. It was pretty frustrating.
Was NS1 trying to drive me away?
It sure seemed like it.
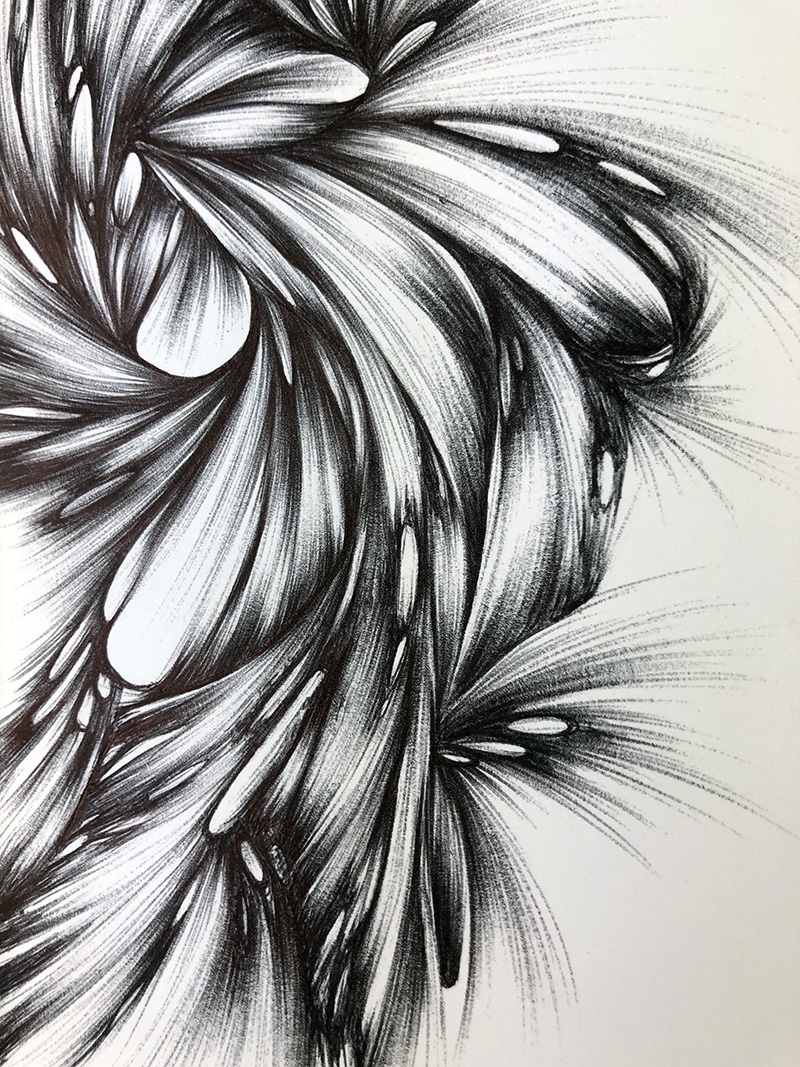
An up close and personal look at my drawing with the 0.7 mm point of the NS1 pen.
You can see my struggles in this close-up.
It’s a little jagged in places where I was battling with the pen to get the ink flowing.
I wondered if I’d already run the pen out of ink, but that seemed doubtful as I’d only done two small Moleskine drawings with the pen. I switched back to the 1.0 mm and then the 0.5 mm points and started having the same problems with those as well. What the what? I could always get the ink flowing again, but I was pretty disappointed. My wonder pen wasn’t all that wonderful after all.
I worried we might be breaking up.

I’m going to give this drawing away to someone on my mailing list. Are you on the list?
I Gave it One More Shot
When I was cleaning up my studio the other day, I found some lovely drawing paper that I’d forgotten I had. It’s smooth with just a tiny hint off a tooth to it.
I decided to give the NS1 a second chance.
I’m so glad I did. The NS1 worked beautifully on this paper. The seizing up issues were gone. The ink flowed beautifully. Our relationship was saved!
But, why did NS1 try to give me the brush off earlier?
I suspect it was the paper in my Moleskine sketchbooks. That’s weird though. Nicolas Sanchez (NS1 designer) draws in Moleksines all the time.
All I know is that the NS1 pen is a keeper.
It’s not going to be exclusive between us, I still have love for my Bics and my Papermates, but NS1 has earned a place in my pen repertoire.
That’s all for now.
Is there a pen you’d like me to review? Give me a shout!
Ciao, Jen
Let’s keep in touch!
Sign up with your email address to get inspiration, updates, and education sent directly to your inbox.